
Many use AI for images, but few know how to build a proper (Workflow)!
Here are 10 secrets along with prompts that will take your image generation skills from beginner to pro 
This time, we’ll use the new GPT Image 2.0 model with its powerful updates 
Come on, follow along 
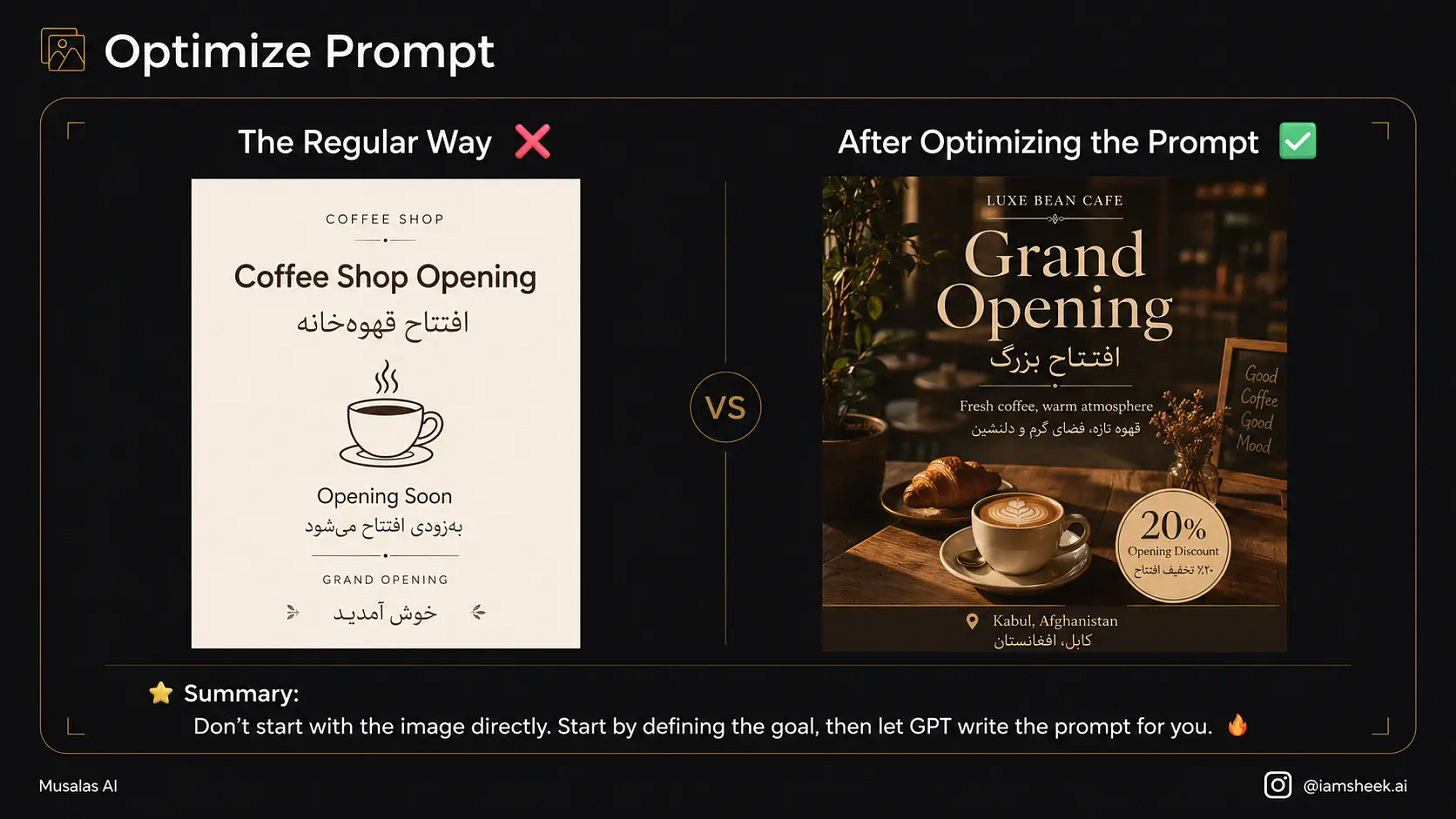
Method 1: Let GPT Write the Prompt for You First
Instead of writing: “I want a coffee shop opening design.”
Tell it: “I’m designing a coffee shop opening poster. Ask me about the details you need so you can write a professional prompt for me.”
→ Prompt Used:
Don’t create the image directly. First, help me turn my idea into a professional prompt.

Ask me about:
the goal, usage, audience, style, colors, lighting, composition, main elements, and required text.

Then write me a final, clear, and organized prompt.

My idea is: [Write your idea here]
Method 2: Deconstructing Images to Extract the Prompt
Saw an image on Social media or Pinterest and liked it? Upload it and say: “Break down this image for me and extract its prompt (lighting, style, composition) so I can make something similar.”

→ Prompt Used:
Analyze this image visually without copying it.
Extract from it:
the subject, scene, composition, camera angle, lighting, colors, textures, style, and overall mood.
Then turn this analysis into a new, usable prompt.
Method 3: Reinventing the Image
Got a nice image for you, but want a different touch in it? Use it as a reference and let it generate new versions and ideas from it with the same spirit.

→ Prompt Used:
Use the reference image as a source of inspiration only.
Keep the overall feel and visual composition, but change the idea to:
[Write the new idea]
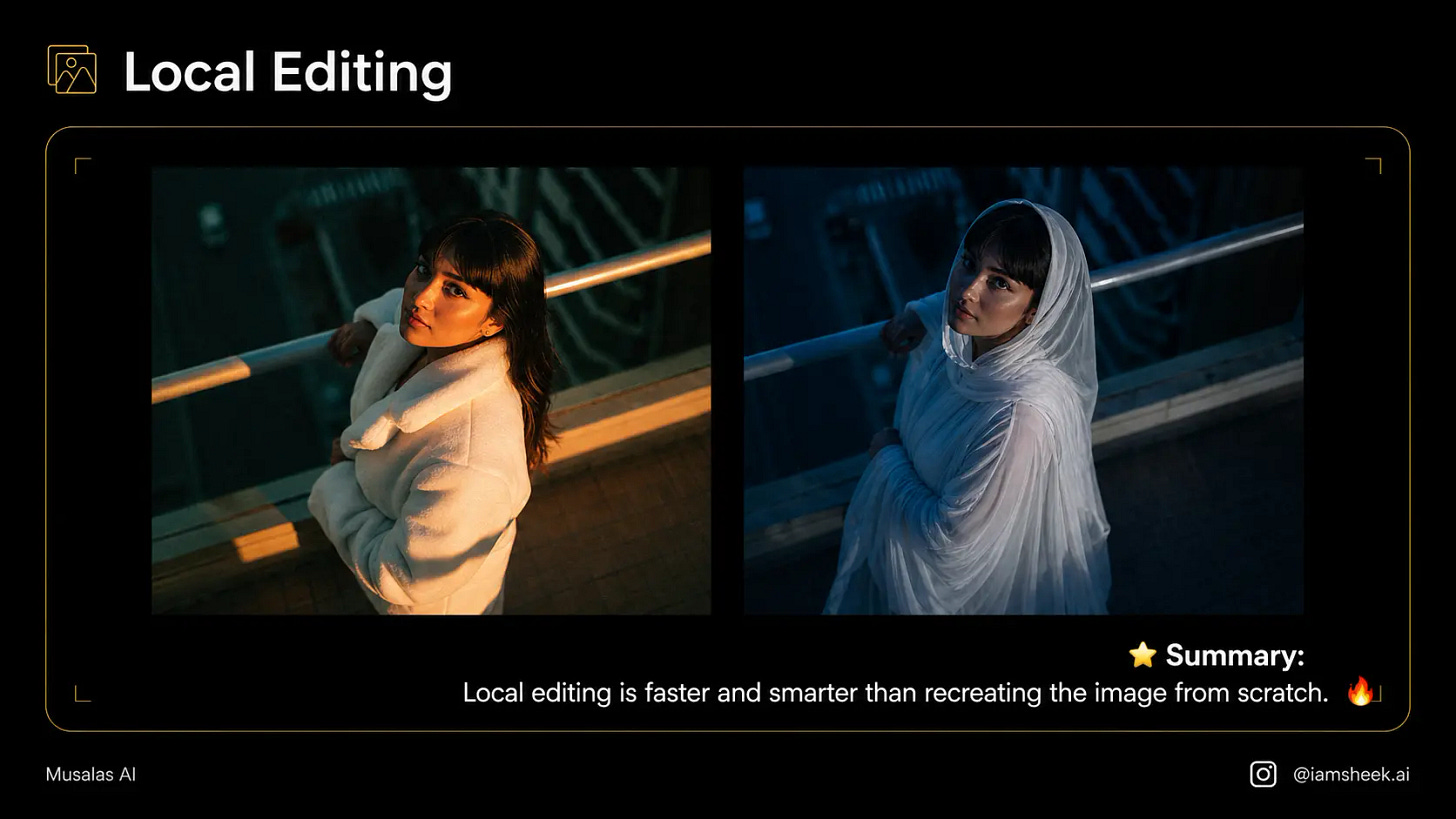
Make the result original, professional, and different from the reference.Method 4: Precise Partial Modification/Editing
If the image is perfect, but you don’t like the model’s clothes! Don’t regenerate the whole image and lose it—just select the clothing and ask to change it, and everything else will stay the same.
What can you modify?
-
 Clothes (style / color / material)
 -
 Colors (overall mood / palette)
 -
 Background (location / elements)
 -
 Texts (font / content / layout)
 -
 Lighting (strong / soft / cinematic)
→ prompt used:
Edit only one element in the image:
[write the element you want to change]
Keep all other details exactly the same:
the face, identity, lighting, background, camera angle, composition, overall colors, and textures.
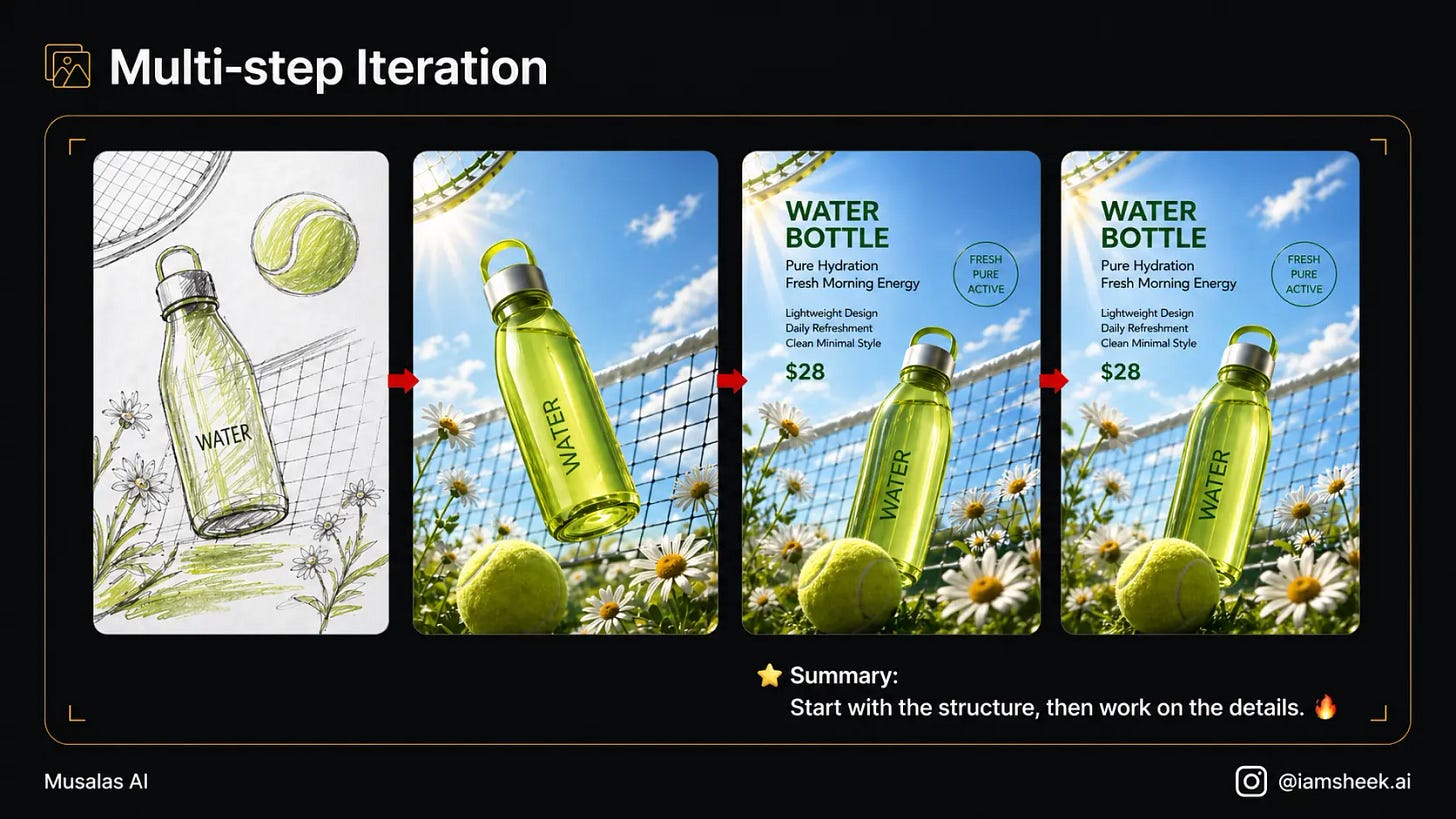
Do not change anything else.Method 5: Staged Repetition
Don’t cram all your requirements into one prompt and end up with a mess!
Start with the basic composition, then adjust the lighting, then add the texts. Working step-by-step gives you a much more refined result.
→ Prompt Used:
Do not create the final result directly.
Break the process into stages:
1. Initial composition
2. Style development
3. Adding text and elements
4. Refining details
5. Final version ready for publishing
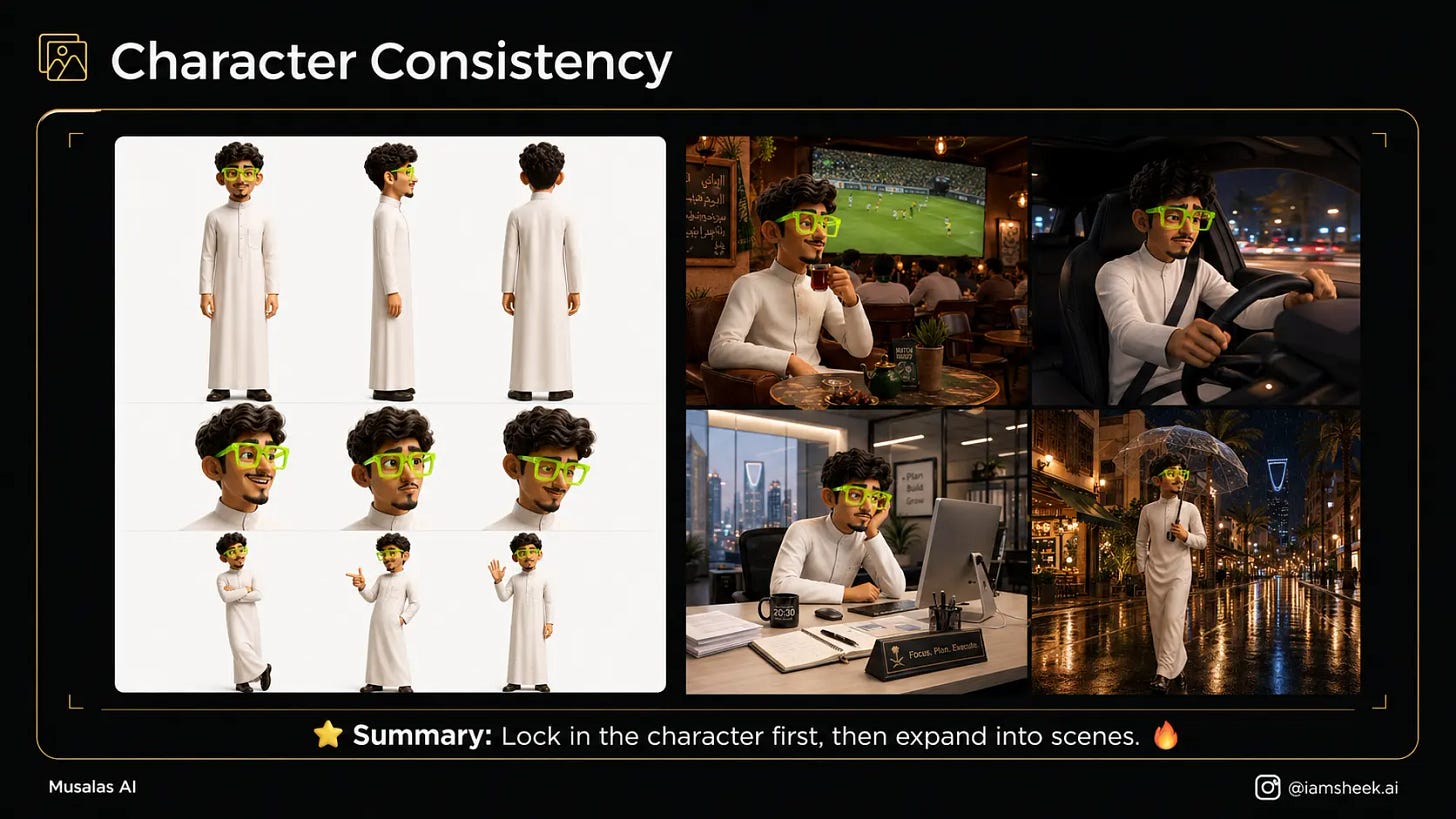
Start with stage one only, and wait for my approval before moving to the next stage.Method 6: Character Consistency
Design a character (for example, a mascot for your brand), then ask the AI to place it in different scenarios (in a café, walking in the rain, working).
The AI now can maintain consistent facial features and identity across all images!
→ Prompt Used:
Create a character sheet for one consistent character.
Show it from:
front, side, and back views.
Add different expressions:
happy, curious, surprised, sad, and calm.
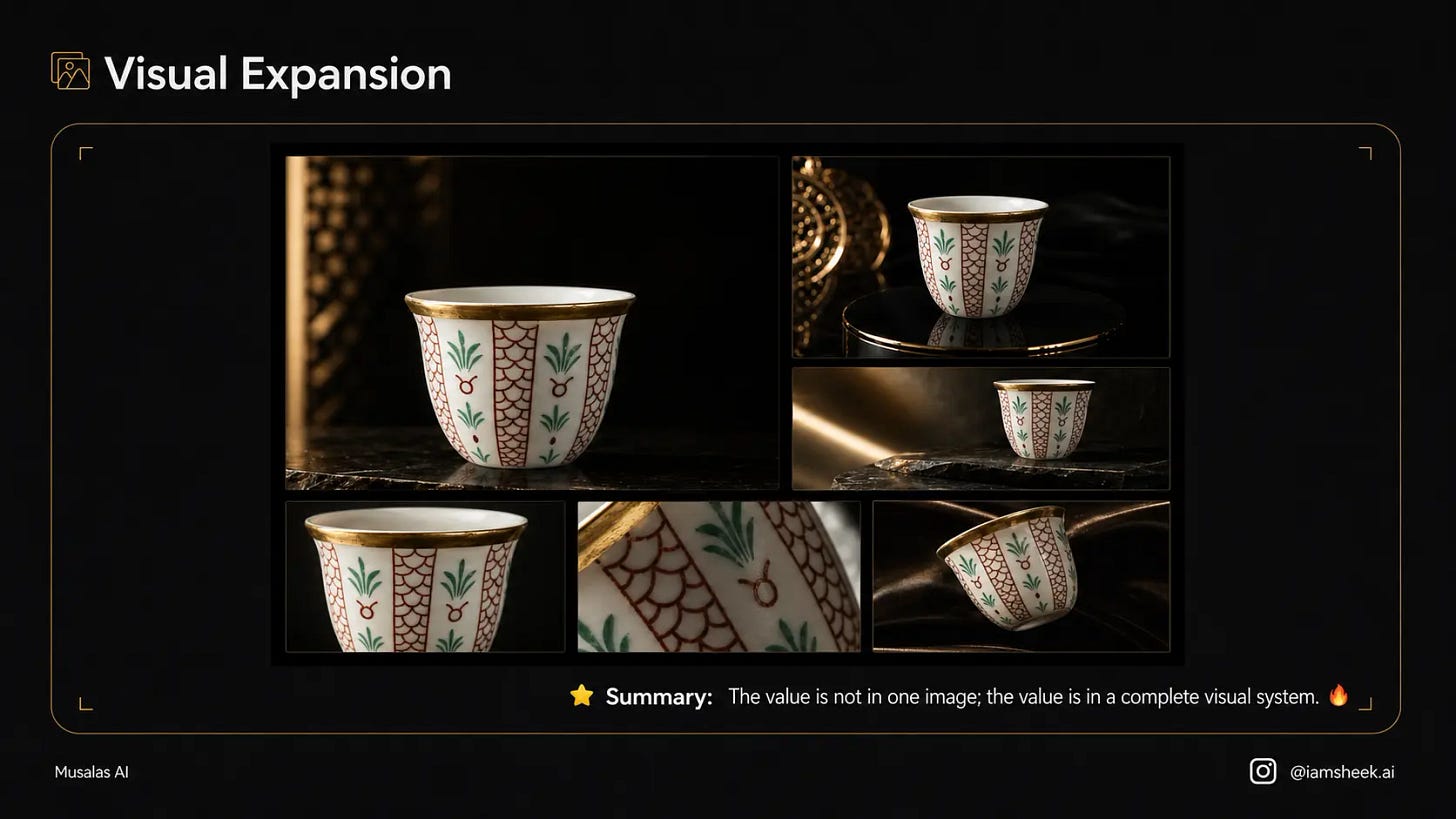
Then include 3 different poses while keeping the same identity, facial features, and clothing.Method 7: One Main Image ➝ Full Package
Don’t just create one image and stop there.
You can turn it into a complete campaign—here’s how:
Start with a Key Visual (main image),
then expand it into multiple sizes and formats for different platforms.
→ Prompt Used:
Turn this key visual into a complete visual campaign.
Keep the same identity, style, and colors.
Generate:
1. Square post (1:1)
2. Vertical story (9:16)
3. Horizontal banner (16:9)
4. Social cover (3:4)
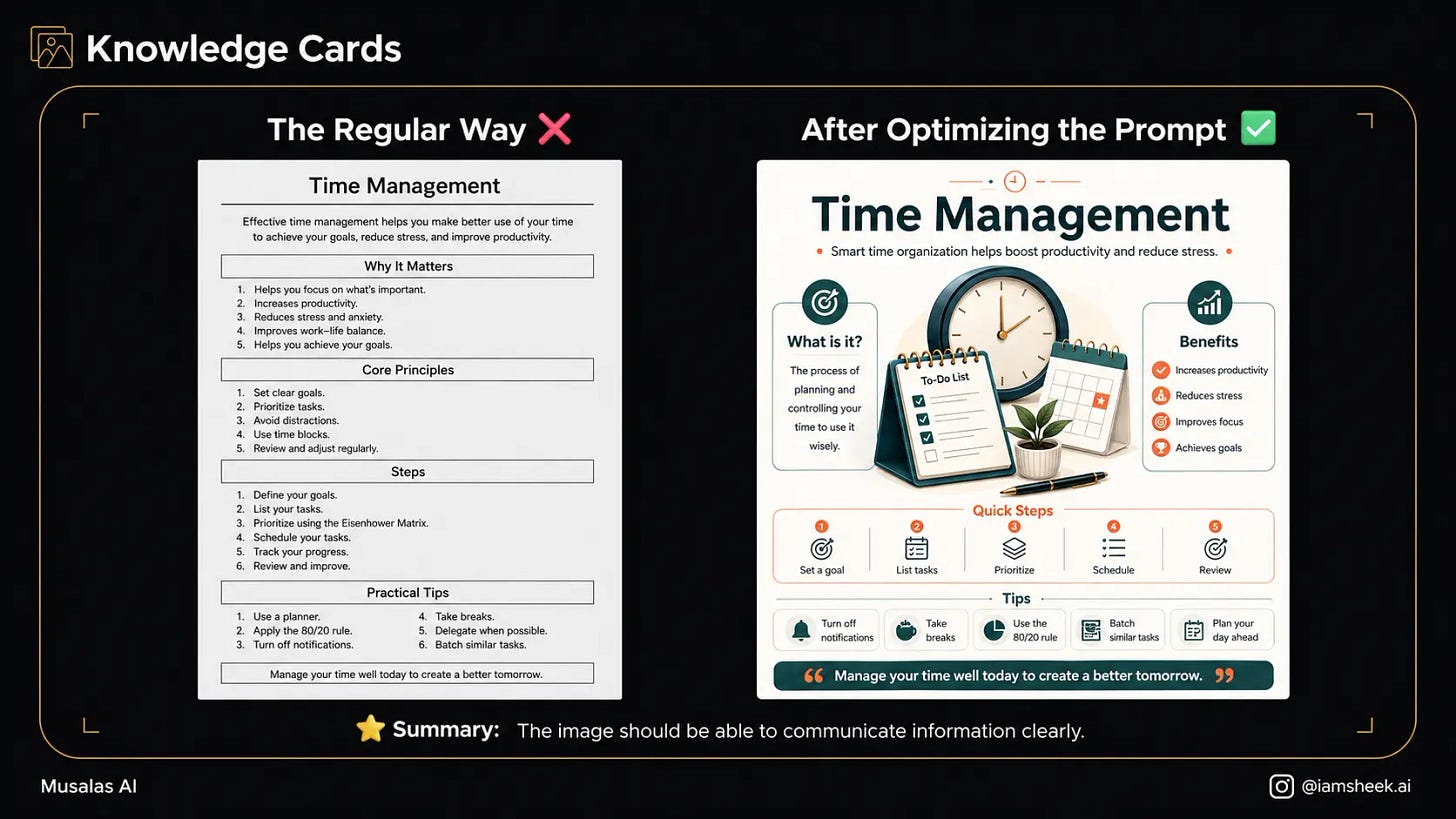
Maintain a consistent visual identity across all versions.Method 8: Knowledge Cards / Infographics
Instead of traditional designs packed with text, have it turn your information into attractive and organized visual cards—that work great for explanations and content creation.
→ Prompt Used:
Turn this information into a clear and attractive infographic.
Make the design clean, organized, and easy to read.
Use:
a main title, concise bullet points, simple icons, clear visual hierarchy, and comfortable white space.
The information is:
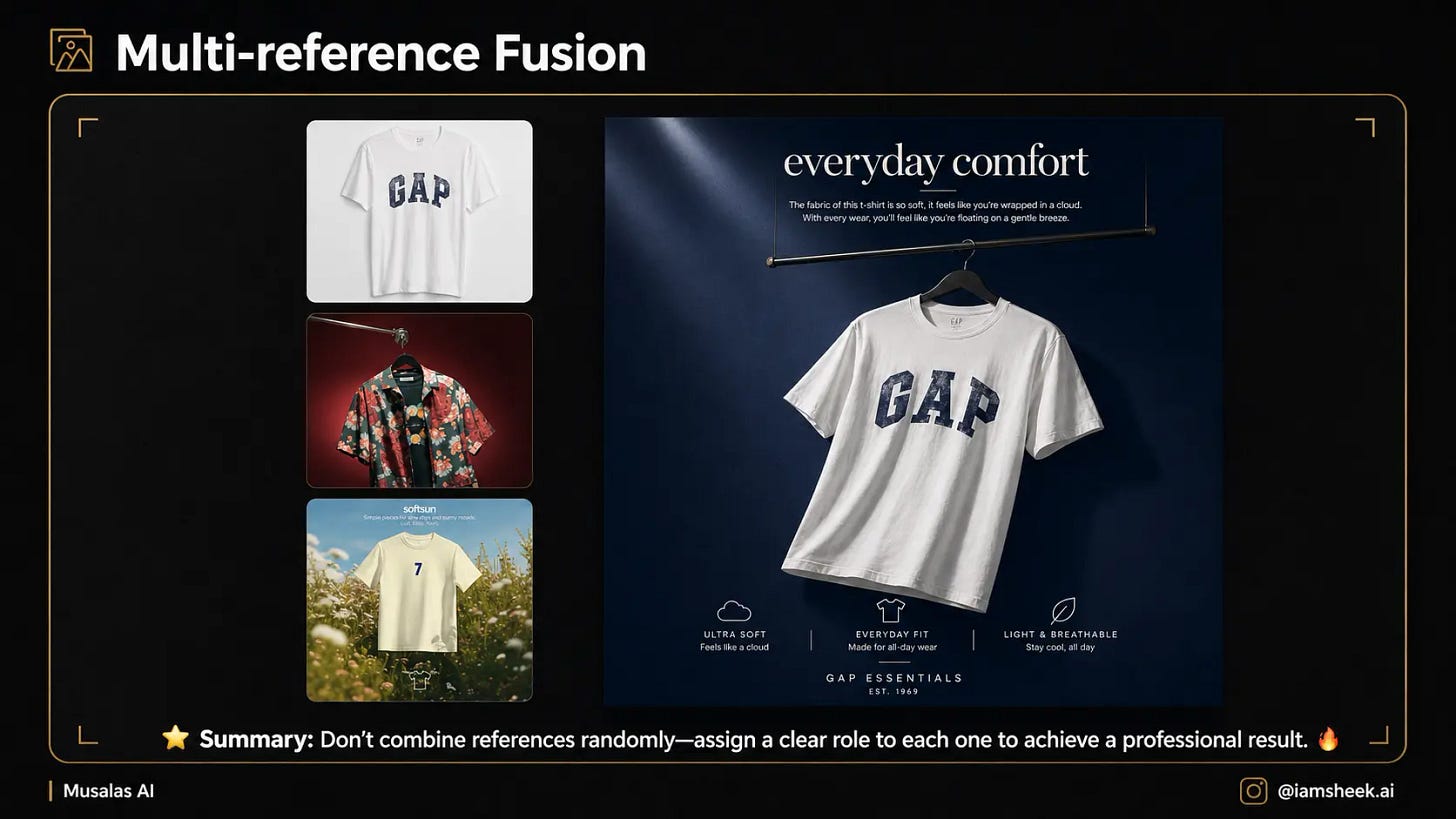
[write the information here]Method 9: Combining Multiple Reference Images
This is a move that a lot of pros use:
Upload 3 images and tell it: Take the lighting from the first image, the composition from the second, and the style from the third, and distribute the tasks among them so you end up with a mind-blowing result!
→ Prompt Used:
I have multiple reference images. Use each image for a specific role:
Image A: main subject or product
Image B: style, lighting, and colors
Image C: composition and layout
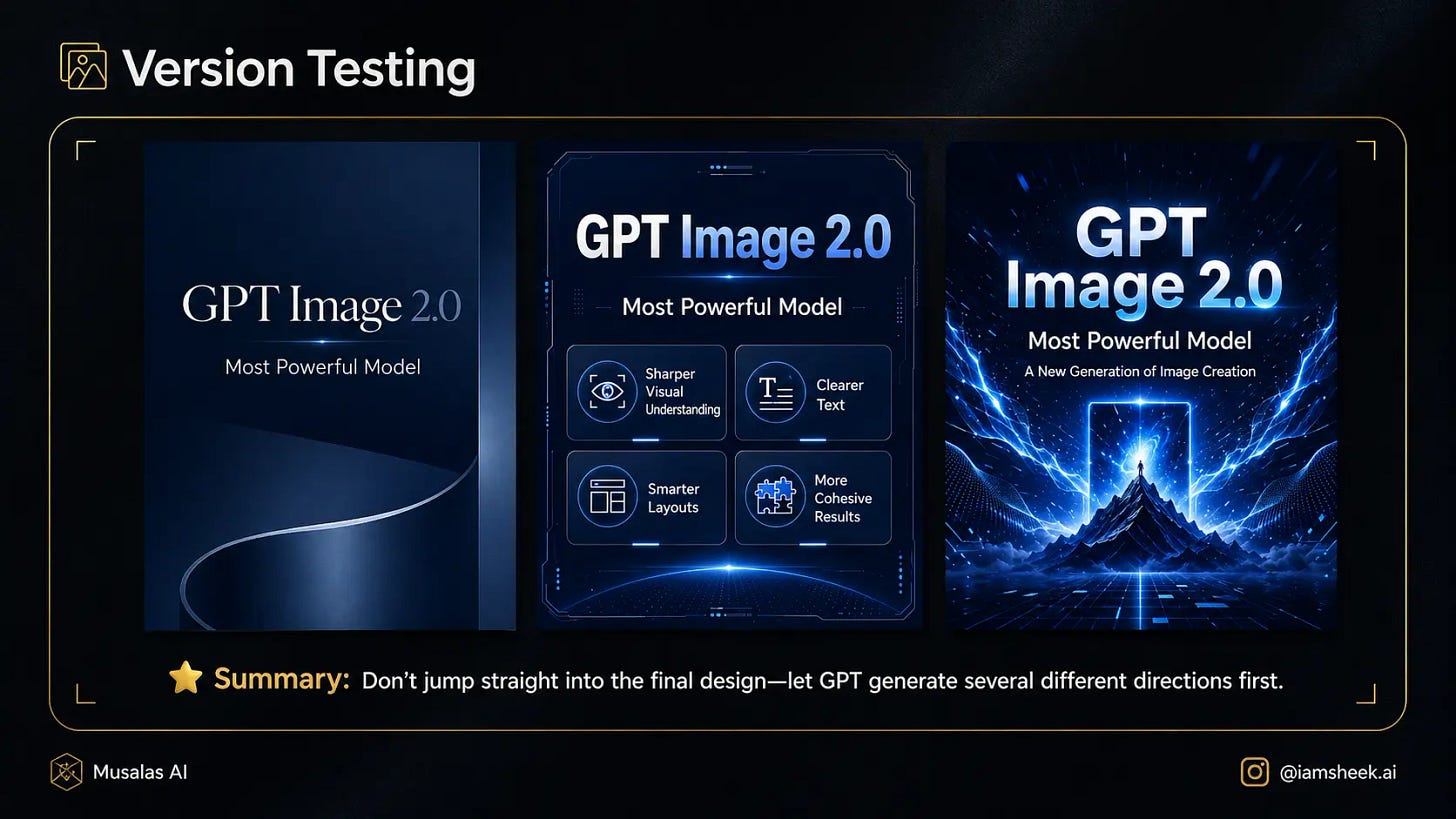
Combine these roles into one cohesive, professional result without directly copying any single image.Method 10: Test Multiple Copies First
Before committing to a concept and wasting your time on details, ask for multiple visual directions. Say: “Give me 3 different visual directions for the same idea.” Choose the one that suits you best, and then continue refining it.
→ Prompt Used:
Do not create the final design directly.
Give me 3 different visual directions for the same idea:

1. A strong cinematic direction
2. A clear informational direction
3. A luxurious minimal direction

For each direction, describe:
the concept, style, colors, composition, and overall mood.

My idea is:
[Write your idea here]
⌦ Professionalism in AI isn’t about knowing how to write a prompt that generates a single image. True AI mastery is about building a complete (Workflow) that you can edit and develop until you reach the result you have in mind. 
Golden Prompt: 
Do not generate the image directly.
First help me define: the goal, use case, target audience, style, and reference distribution.

After that, give me 3 different directions. I will choose one, and we will develop it into a complete series.
If this article helped you, share it with your friends and show us your experiments with us by mentioning @iamsheek.ai on Instagram!
If this resonated, share it with one creator who’s been fighting their AI tools instead of using them.
And subscribe so you don’t miss what’s coming next week.
It’s going to be provocative.
Obviously.
Be that person.
This newsletter is entirely free. I want to be the greatest filter to the permanent AI noise.
Some people came because of my Instagram. But most readers subscribed because someone they trusted sent one of my articles to them.
If this article helped you, be that person for someone else (and share it):
It does not cost you anything to share. And sharing keeps this newsletter free!
If someone sent you this, first thank them, and don’t miss the next guide by subscribing for free. Bonus point if you introduce yourself in the comment section.